Jim's Homemade Bubble Machine
Made this bubble machine a few years back for the kids.
Parts
- 1/16" Acrylic, approximately 2' x 2'.
- Weldon-3 Acrylic Glue
- Low RPM 12V motor (I used a 20rpm gearhead motor.
This one
from All Electronics, $13.75, might work. Also check that site for other gearhead motors.)
- Two 100 Ohm Potentiometers
- SPST Toggle Switch
- 12V DC 92mm Muffin Fan (Like this one
from All Electronics, $3.50)
- 8-Cell AA battery holder (Like
Radio Shack #270-407, $1.89)
- Bubble Solution (available at Kmart, target etc. You can usually find half gallon or bigger
jugs for a couple bucks)
- (Optional) Fuse Holder with 0.5A fuse
- (Optional) Female coax power jack with switch
like
this
or
this
depending on the plug on your wall transformer.
- (Optional) 12V wall transformer
- (Optional) Several blinking LEDs
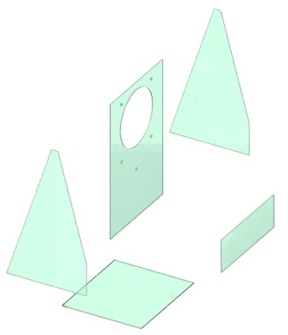
Scale Drawings for Apparatus
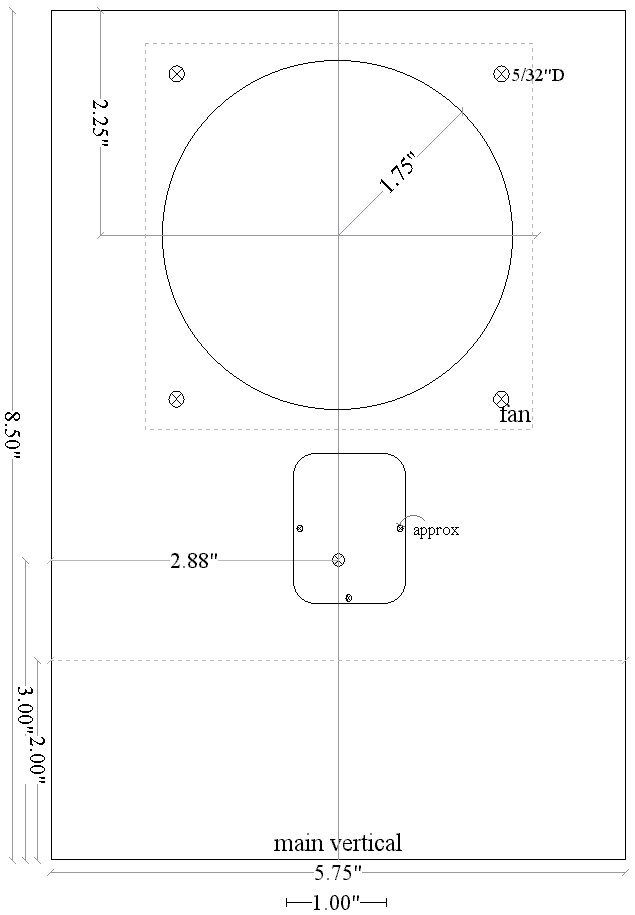
The main support. You may need to resize the various holes to match your motor and fan.
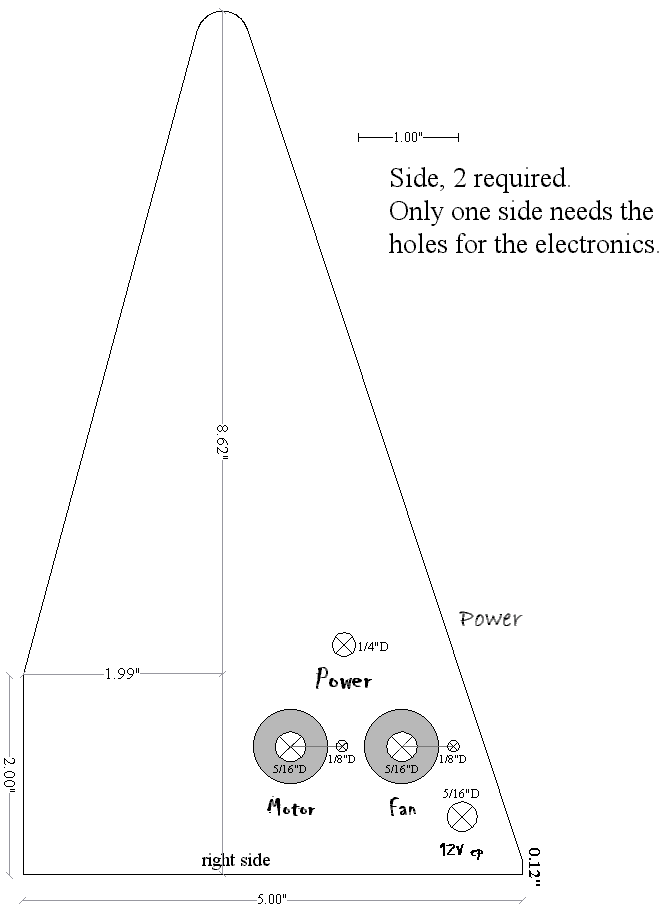
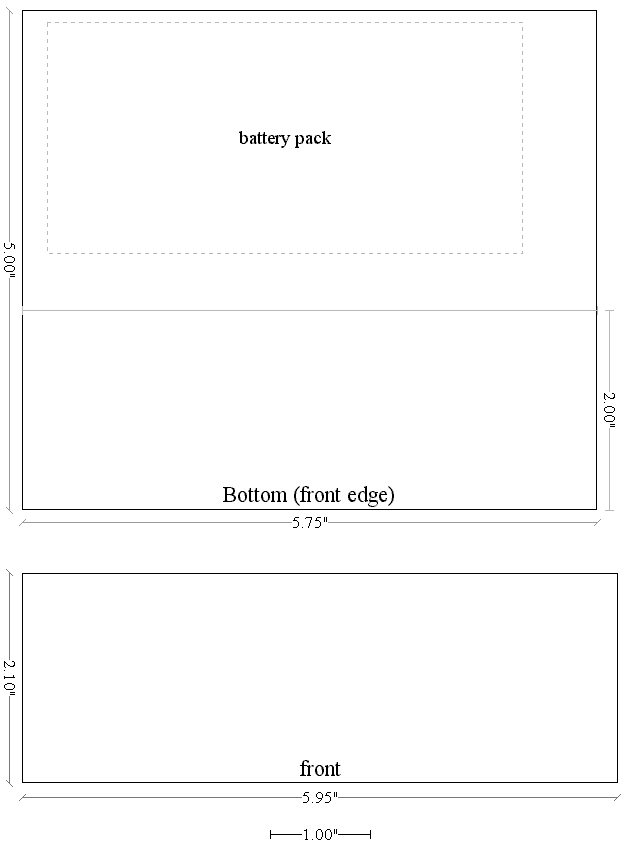
The sides.
The bottom and front.
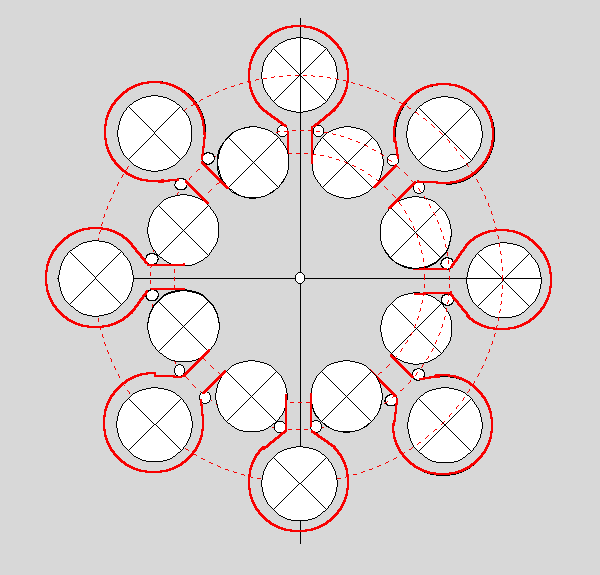
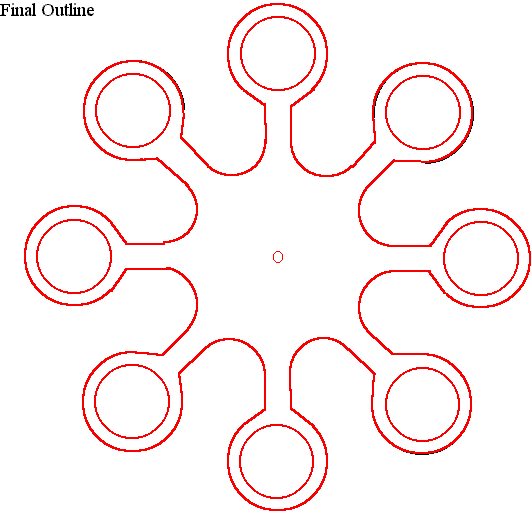
The bubble wand was constructed from 1/16" acrylic as outlined below.
- Drill 16 3/4" holes where indicated in the drawing below.
(The red dashed layout rings are
at 1.25, 1.5" and 2" diameters.)
- Drill 16 3/32" holes.
- Drill a suitable hole for the motor axle.
- Cut along the heavy doted red line with a scroll saw.
- I added a circular piece of acrylic to the center so there was more material in contact
with the motor axle.
- The bubble wand was epoxied to the mtor axle.
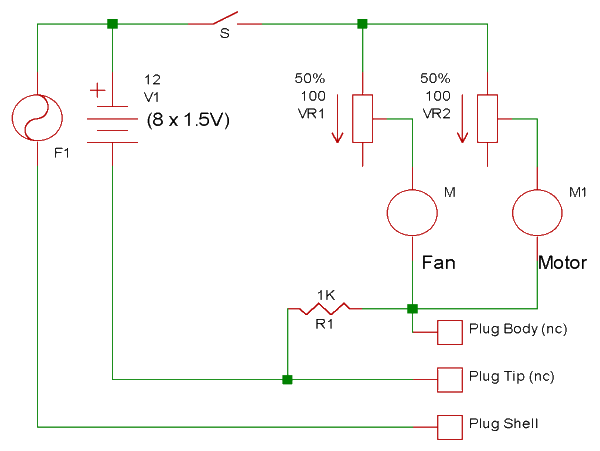
Wiring Diagrams
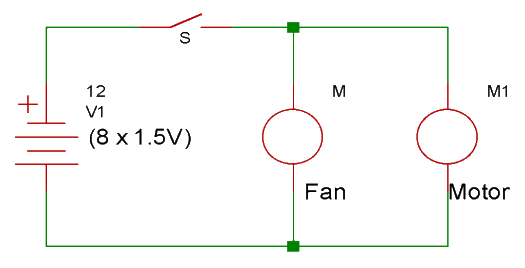
Simple Circuit
More compex circuit
This more complex circuit includes speed controls for the fan and wand motor
and a simple recharging circuit. I used a 0.5 amp fuse.
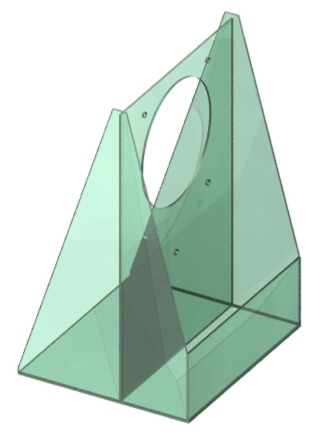
Construction
If you look closely at the scale drawings you'll notice that the main support and the
bottom are supposed to be the same width. It is critical that this is so. If these are not the same width
it will be very difficult to get the bubble solution compartment to seal. I first cut a piece of acrylic that
was 5-3/4" wide and about 15" long. From this piece the main support and bottom were cut. The exact
dimensions of the side and front pieces are less critical.
The acrylic parts were cut out and the various holes were cut or drilled. The pieces were then
taped and clamped together and the Weldon 3 glued applied with a syringe. The glue is just drawn into the
joints by capilary action. My parts were cut accurate enough so that the joints were water tight.
If your joints leak, you can use bath tube caulk to seal them.
The electronics were now installed. I got a bit carried away and included blinking LEDs, motor speed
controls and a recharging circuit. All you really need is the fan, motor, battery holder and a switch.
If you include the ability to use a wall transformer then you should include the 0.5 amp fuse for safety.
Making Bubbles
Just fill the resevoir up with bubble solution and turn it on.
Recharging
Make sure the polarity matches your wiring!
Just plug in a 12V wall transformer for a few hours.
Copyright ©2005 J. Sluka
Last Modified: 15 August 2005
Send me an email